


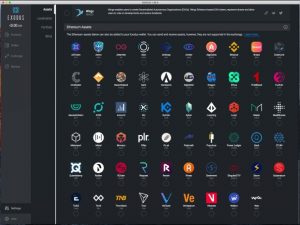
Exodus is one of the most popular multi-currency wallets, supporting dozens of cryptocurrencies, including bitcoin, bitcoin cash, litecoin, ethereum, dash, monero and the major ERC20 tokens.
The Exodus development team is very active and regularly adds new coins. In addition, Exodus has an integrated exchange to quickly swap between cryptocurrencies.
Here’s how to install and use it to send and receive cryptocurrencies.
Exodus: a bit of history and details
Exodus was born in December 2015, although the first public stable version was released in April 2016. It is one of the most popular desktop wallets, as it is available for Windows, Linux, and Mac OS. However, the wallet’s popularity is mainly due to the large number of supported cryptocurrencies and the ease of use.
Over the years, Exodus has also improved by introducing an internal exchange to the wallet for the purchase and sale of major cryptocurrencies.
Like Electrum, Exodus is also a light wallet, as it does not require the complete synchronisation of the blockchain locally on the user’s PC. With the growth of transactions and the increase of blocks, the bitcoin blockchain to date has a size of about 220 Gigabytes. Exodus avoids downloading the entire blockchain by using a client-server protocol to access the blockchain stored on a network of redundant servers.
The development team is very active and new versions are released very frequently, it is also possible to customise the wallet using various skins and themes. Unfortunately, the software is not completely open source.
First step: download, installation and first transaction
First, it is necessary to download the Exodus installation file. It can be downloaded from the official website.
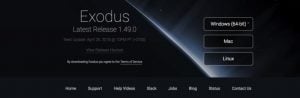
It is necessary to select the version for the operating system in use. In the following guide, Mac OS X will be used as a reference, but the procedure is the same for each OS.
During the installation procedure, it is necessary to confirm and proceed until completion. Once installed, clicking on the wallet icon will start it up.
At this point, the wallet will open by default on the dashboard. On the left, there are the navigation menus for the various sections of the wallet, while at the bottom there are some of the supported currencies. The settings menu is at the bottom.
By clicking on settings it is possible to access four new sections: one related to which coins to show, one related to the portfolio, the location – to set the local currency – and finally to the themes available for Exodus.
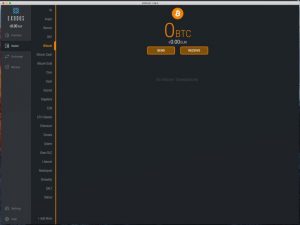
Whereas in the wallet section, it is possible to access the actual wallet, coin by coin.
By clicking on settings it is possible to access four new sections: one related to which coins to show, one related to the portfolio, the location – to set the local currency – and finally to the themes available for Exodus.
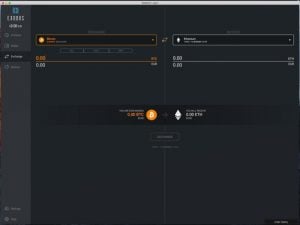
In the menu below, it is possible to access the exchange integrated in Exodus, which allows trading with the major cryptocurrencies.
However, in order to actually use the wallet and create a backup, it is necessary to make a deposit, as indicated in the wallet menu.
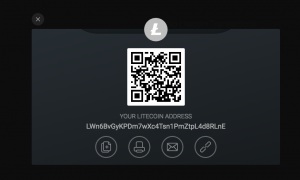
So here’s how to send funds to the Exodus wallet. In the example shown, Litecoin will be deposited, although the procedure is the same for any coin, even for the ERC20 tokens.
First, it is necessary to go to the wallet section and choose the currency to deposit, in this case, LTC.
Clicking on Receive will generate a deposit address. It can be scanned using the QR Code, sent by email or copied directly with the shortcut key.
At this point, it is necessary to carry out a transaction of the chosen currency towards the Exodus wallet address.
Once the funds have been deposited, it will finally be possible to back up the wallet and set the SEED and password.
The backup section will have a red icon to draw attention. Clicking on it will start the backup procedure of the wallet.
First, a secure password with at least eight characters, including at least one number and one capital letter, must be created. Subsequently, it will be necessary to confirm the password a second time.
At this point, the SEED will be shown. The SEED consists of a 12-word sentence that should be kept in a safe place and preferably offline, as it is essential to be able to access the funds at any time and anywhere, even if the PC is destroyed.
Finally, the user will be asked to enter their email address in case of a password reset. At this point, it will be sufficient to click on Finish.
After the procedure, the user will have access to a secure Exodus wallet with backup and SEED recovery.
Second step: use the exchange to trade currencies
Exodus offers an excellent built-in exchange for trading ERC20 tokens and cryptocurrencies. This is how it works.
The first step is to open the exchange section. The default screen will show the bitcoin/ethereum pair. On the left, there is the currency with which to pay (bitcoin in this case), on the right the one that will be bought (ethereum).
In the example, Litecoin will be exchanged for Ethereum. First, it is necessary to select Litecoin on the left in the drop-down menu. On the right, Ethereum.
At this point, it is necessary to indicate how many Litecoins are to be traded. It is possible to use the All, Half and Min shortcut keys. The first will allow exchanging all the Litecoin present in the wallet, the second only half, while the third the minimum amount that can be traded. The latter varies from currency to currency.
Once the quantity has been chosen, it is necessary to press on exchange to execute the trade. The exchanged currency will immediately be deposited in the relevant wallet.
Fees are quite high and vary from currency to currency. In general, they are between 5 and 10% of the amount traded.
Third step: executing outgoing transactions
To withdraw a cryptocurrency, the first thing to do is to choose the currency to be transferred in the wallet section.
At this point, it is necessary to click on the Send button. A screen will be displayed where the recipient’s address and the amount of tokens to be sent must be entered.
Once all the fields, i.e. address and quantity, have been filled in, it is necessary to click on the Send button.
At this point, the user will be asked to confirm the procedure once more.
After a few seconds, a screen showing the successful transaction will appear.
Depending on the currency chosen and the congestion of the network, it could take from a few minutes to even a few dozen to actually receive funds on the recipient wallet.
Restoring the wallet from the SEED
If an Exodus wallet has already been created in the past, it can be restored using the 12-word SEED. When starting the wallet it will be necessary to choose the Restore option.
The wallet will then restart and the SEED will have to be entered
Next, it will be necessary to type the twelve words, being careful to follow the original order and inserting a space between one word and another.
When the operation is complete, click on the arrow on the right.
The wallet will then be retrieved and a confirmation message will appear.
Portfolio and themes
As mentioned in the introduction, Exodus also allows viewing the complete portfolio with an excellent and intuitive graphical interface. The wallet’s dashboard will automatically update the balance, showing a pie chart broken down according to the deposited cryptocurrencies and ERC20 tokens.
It will also show the total balance in EURO or Dollars of the tokens contained in the wallet and also the value of the individual cryptocurrencies deposited. In addition, it is also possible to customise the graphic interface, choosing from dozens of skins, themes and colours, all of which are available in the settings.
Considerations
Exodus is a very simple wallet to use, also considering the really user-friendly and intuitive interface. It is also very convenient since it allows storing on a single wallet dozens, if not hundreds, of cryptocurrencies and ethereum ERC20 tokens.
It does not require downloading the blockchain and is also quite fast to use. The only drawback that might make the more experienced users stay away from it is the fact that Exodus is not completely open source.
