With the advent of decentralized exchanges such as Bancor or Uniswap, the problem of Impermanent Loss has emerged, i.e. the difference between the values of tokens placed in a pool and those held in the wallet.
Liquidity pools, systems in which a user can provide liquidity with 2 tokens in proportion to their value, have generated an incredible market, partly because anyone can list their token.
But this also entails problems, such as impermanent loss.
What is impermanent loss?
Considering that pools have a 50/50 weight, this means that the value of the respective tokens must be the same, but in the case one of the two increases, the pool automatically sells the token that has increased to buy the less valuable one so that the pool self-balances.
This means that the total of the initial tokens placed will probably be different when choosing to withdraw them.
This loss, however, is only virtual, in the sense that if the value of the tokens increases beyond the price at which they have been deposited, then the impermanent loss is cancelled.
Instead, when withdrawing the tokens below the value at which we had included them in the pool, this loss from virtual will become real and the difference between the total of the deposited tokens and the withdrawn ones will be negative.
Impermanent loss, the solution of Bancor
That being understood, Bancor has worked hard to mitigate and eliminate this disadvantage and has recently activated version 2.1 of its protocol for this purpose, enabling both protection against impermanent loss and exposure with only 1 token in a pool instead of 2.
This guide will show both methods. The system is the same for both tokens based on the EOS blockchain and those of Ethereum.
How to use Bancor
First, it will be necessary to unlock our wallet, in this case, we will use MetaMask, whereas if we use EOS tokens we can use different wallets like Scatter and Anchor.
Then we’ll have to connect to the platform, here the one for Ethereum and here for EOS, and click on the “Connect Wallet” button in the top right corner.
After connecting, the interface is very simple and intuitive. We will have 2 options:
- the first is for pool protection,
- the second is used to use a single token.
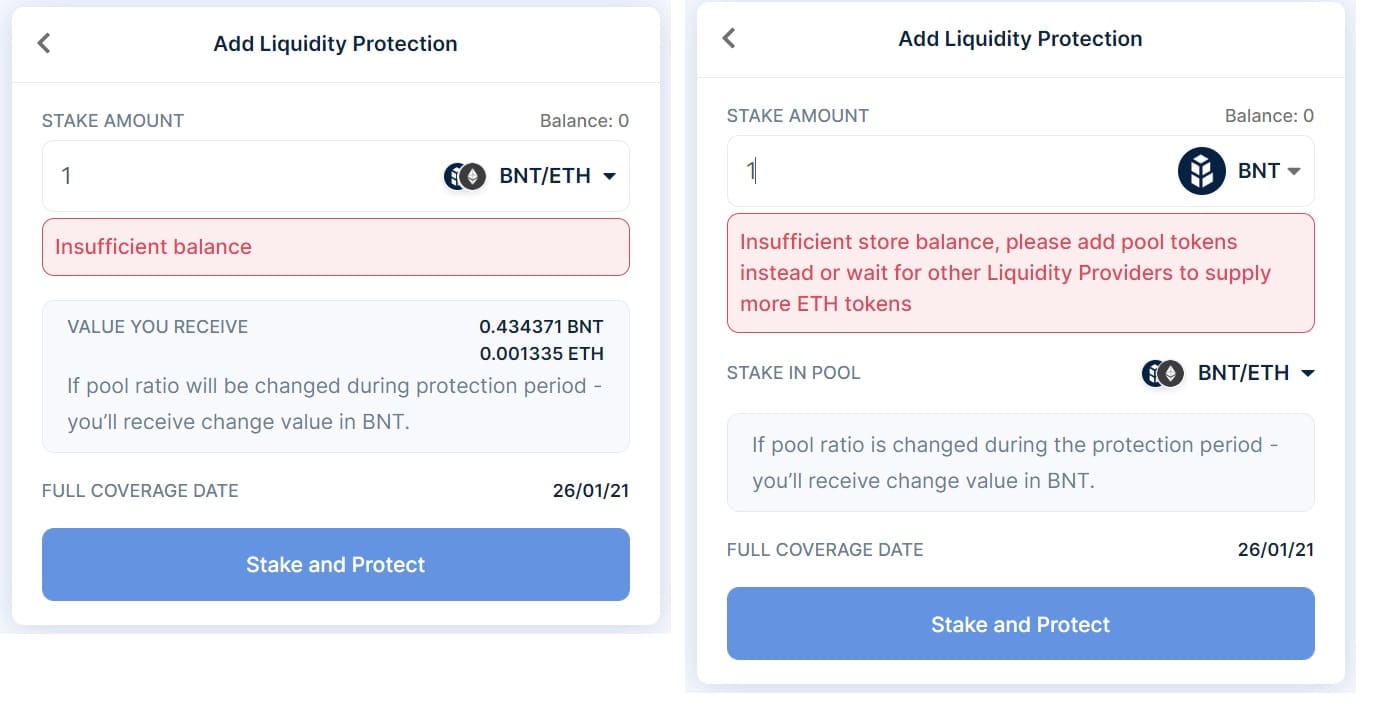
Firstly, we will have to press the “Stake” button and then choose which protection we want, whether “single-sided” or “dual-sided”.

After that we’ll have to choose the pool we’re interested in, in our case, we’ll put BNT/ETH and in the “dual-sided” version we’ll put both ETH and BNT tokens with equal value.
In our case, it is 0.4 BNT and 0.00012 ETH, while in the “single-sided” version, we choose whether to put only BNT or only ETH.
Finally, we click on the “Stake and Protect” button and confirm the transaction with our wallet paying the relevant fee.

We will then be able to see our liquidity in the “Protection” section and also withdraw the funds using the “Withdraw” button.
In this way, we will have all the advantages of the pool, namely the fees and possible rewards from liquidity mining.


